How to Avoid Death by Gradle - painless Android Studio configuration
Android Studio (AS) can be very frustrating if you do not carefully configure the following for every project:
1. Configure Gradle
2. Configure Gradle Plugin
3. Configure Java JDK
4. Configure Android SDK
5. Upgrade build.gradle Syntax
6. Migrate to AndroidX
Though Google has expertise in AI and could easily have implemented all the above via AI automation, they choose to leave it to you to trudge through the arduous task of setting up your IDE. They say calm waters never made skilled sailors. Welcome to stormy waters; I hope they will help you become a skilful Android sailor.
Details follow. The layout is not very clean but remember the skilful sailor story?
C:\Users\YourUserName\AndroidStudioProjects\AndroidExample\gradle\wrapper\gradle-wrapper.properties
Insert the statement below but change the last part to indicate the version of Gradle you want to download and install. The "bin" version has no documentation while the "all" version includes documentation. As of the update of this blog post, 6.1.1 is the latest version hence, the version should read gradle-6.1.1-bin.zip or gradle-6.1.1-all.zip


compile fileTree(dir: 'libs', include: ['*.jar'])
testCompile 'junit:junit:4.12'
compile 'com.android.support:appcompat-v7:24.1.1'
compile "com.android.support:recyclerview-v7:23.0.1" // dependency file for RecyclerView}
implementation fileTree(dir: 'libs', include: ['*.jar']) testImplementation 'junit:junit:4.12'
implementation 'com.android.support:appcompat-v7:24.1.1'
implementation "com.android.support:recyclerview-v7:23.0.1" // dependency file for RecyclerView}
"compile" becomes "implementation", "testCompile" becomes "testImplementation" as of Gradle 4.0
See:
implementation 'com.android.support:appcompat-v7:24.1.1'
implementation "com.android.support:recyclerview-v7:23.0.1"
According to the AndroidX migration site:
With Android Studio 3.2 and higher, you can migrate an existing project to AndroidX by selecting Refactor > Migrate to AndroidX from the menu bar.
1. Configure Gradle
2. Configure Gradle Plugin
3. Configure Java JDK
4. Configure Android SDK
5. Upgrade build.gradle Syntax
6. Migrate to AndroidX
Though Google has expertise in AI and could easily have implemented all the above via AI automation, they choose to leave it to you to trudge through the arduous task of setting up your IDE. They say calm waters never made skilled sailors. Welcome to stormy waters; I hope they will help you become a skilful Android sailor.
Details follow. The layout is not very clean but remember the skilful sailor story?
1. Configure Gradle:
You can set the Gradle version in the file gradle-wrapper.properties found here (your location may be different):C:\Users\YourUserName\AndroidStudioProjects\AndroidExample\gradle\wrapper\gradle-wrapper.properties
Insert the statement below but change the last part to indicate the version of Gradle you want to download and install. The "bin" version has no documentation while the "all" version includes documentation. As of the update of this blog post, 6.1.1 is the latest version hence, the version should read gradle-6.1.1-bin.zip or gradle-6.1.1-all.zip
distributionUrl = https\://services.gradle.org/distributions/gradle-6.1.1-bin.zip

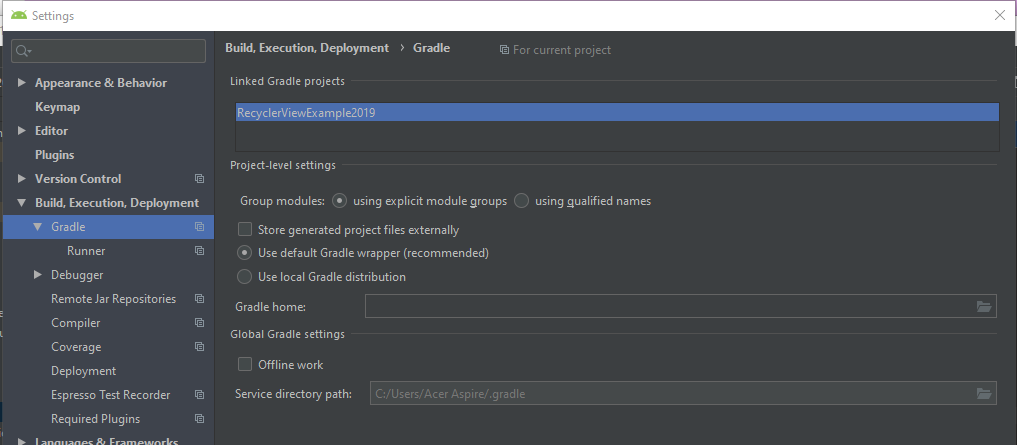
2. Configure Gradle Plugin:
File→Settings→Build, Execution, Deployment→Build Tools→Gradle→Use default Gradle wrapper (recommended)
Open File→Project Structure→Project

Add the latest gradle plugin
https://developer.android.com/studio/releases/gradle-plugin.html#updating-gradle
Configure repositories in the build.gradle (project) file:
-----------------------------------------------------------------------------
// Top-level build file where you can add configuration options common to all sub-projects/modules.
buildscript {
    repositories {
        jcenter()
        google()
    }
    dependencies {
        classpath 'com.android.tools.build:gradle:3.5.0'
        // NOTE: Do not place your application dependencies here; they belong        // in the individual module build.gradle files
-----------------------------------------------------------------------------
The repository setting allows gradle to find your gradle plugin and other dependencies.
In this specific example, if google() is missing, AS will report that it can not find 'com.android.tools.build:gradle:3.5.0'
Android 3.4 will not open a project configured with above gradle settings! You may have to downgrade your gradle or upgrade your AS.
The statement com.android.tools.build:gradle:3.5.0 sets the Gradle plugin version.
3. Configure Java JDK
Many things about AS are absurd. You may struggle to install the latest and greatest Java JDK only for AS to ignore that and use the embedded version 1.8
Truly absurd.
Because AS 3.x seems to use Java 1.8, it is safest to install and configure JDK 1.8. Let JAVA_HOME variable point to the Java 1.8 bin folder, the same folder as set at File->Project Structure->SDK Location->JDK location below. Your exact location may be different:

4. Configure Android SDK
Make sure your minSDKVersion and targetSDKVersion are both installed in Tools->SDK Manager->Android SDK->SDK Platforms.
In Tools->SDK Manager->Android SDK->SDK Tools, you may need to install NDK, SDK Platform Tool, Android Emulator and Android SDK Build Tools. The wisest appraoch is to install the highest Android API version you plan to use (the targetSDKVersion) and also the lowest (minSDKVersion). In my current installation, minSDKVersion=16 (Android 4.4), targetSDKVersion = 29 (Android 10). Without the SDK, Android Studio will not function.
Some of these tools such as the Emulator may be quite massive in size. Be patient and wait for the download and installation that could take hours depending on the performance of your Internet link and computer. Install the minimum number of SDK components. In the case of the Emulator, you may choose to install the lowest version (API 16) and the highest (API 29) to allow testing the lowest API devices and the highest API devices.
5. Upgrade build.gradle Syntax
If your build.gradle (app/module) file looks like this:
dependencies { compile fileTree(dir: 'libs', include: ['*.jar'])
testCompile 'junit:junit:4.12'
compile 'com.android.support:appcompat-v7:24.1.1'
compile "com.android.support:recyclerview-v7:23.0.1" // dependency file for RecyclerView}
It means, your syntax is obsolete. Change to:
dependencies { implementation fileTree(dir: 'libs', include: ['*.jar']) testImplementation 'junit:junit:4.12'
implementation 'com.android.support:appcompat-v7:24.1.1'
implementation "com.android.support:recyclerview-v7:23.0.1" // dependency file for RecyclerView}
"compile" becomes "implementation", "testCompile" becomes "testImplementation" as of Gradle 4.0
See:
- https://docs.gradle.org/current/userguide/java_library_plugin.html
- https://stackoverflow.com/questions/44493378/whats-the-difference-between-implementation-and-compile-in-gradle
6. Migrate to AndroidX
Android has migrated libraries to AndroidX. As an example, you will find these two libraries used in my build.gradle(app) file:implementation 'com.android.support:appcompat-v7:24.1.1'
implementation "com.android.support:recyclerview-v7:23.0.1"
According to the AndroidX migration site:
With Android Studio 3.2 and higher, you can migrate an existing project to AndroidX by selecting Refactor > Migrate to AndroidX from the menu bar.
The refactor command makes use of two flags. By default, both of them are set to
true in yourgradle.properties file:- android.useAndroidX=true
- The Android plugin uses the appropriate AndroidX library instead of a Support Library.
- android.enableJetifier=true
- The Android plugin automatically migrates existing third-party libraries to use AndroidX by rewriting their binaries. It may be easier to manually insert the entries in the Gradle.properties file as follows:
android.useAndroidX=true
android.enableJetifier=true
AndroidX libraries are equivalent to version 28.0.0 of the older libraries. Therefore, we can upgrade the above dependencies to version 28.0.0 as an option instead of switching to AndroidX. In which case the changes in gradle.properties are not required.
implementation 'com.android.support:appcompat-v7:24.1.1'
implementation "com.android.support:recyclerview-v7:23.0.1"
become:
implementation 'com.android.support:appcompat-v7:28.0.0'
implementation "com.android.support:recyclerview-v7:28.0.0"
To use AndroidX, make the changes shown above to gradle.properties then change each dependency by checking for its AndroidX version at
https://developer.android.com/jetpack/androidx/migrate/artifact-mappings
You can download a CSV version of the conversion list here.
For example:
- com.android.support:appcompat-v7:28.0.0
- becomes:
- androidx.appcompat:appcompat:1.0.0
- As much as possible, use AndroidX. Avoid the older libraries
7. Sync Gradle, Fix Errors
On the right side of the AS toolbar, you will see the gradle sync button:
Run gradle sync.
You may get many errors related to missing components or misconfiguration. Do your best to fix them. In most cases, it means modifying the configuration. For example, using Gradle offline may result in AS not finding some gradle components.
If some critical SDK comonents are not installed, AS may fail.
Fixing AS errorsz is part of the job diescription.


Comments
Post a Comment